Fermented Black Radish and Carrots (vegan) / Fermentirana crna rotkva i mrkva (vegansko)

I already gushed over my excitement over discovering the joys of lacto-fermentation in this post here, so if you’re interested in another easy recipe idea, keep reading on. Since it’s very important to have 2-3% of salt ratio to the total amount of all the other ingredients, I strongly suggest using a kitchen scale for all of your lacto-fermentation projects.

IMGP8609

INGREDIENTS:

(0.81 EUR)

200 grams of finely sliced black radish (0.40 EUR)

200 grams of shredded carrots (0.40 EUR)

200 grams of water (–)

15.00 grams of salt (0.01 EUR)

IMGP8606

METHOD:

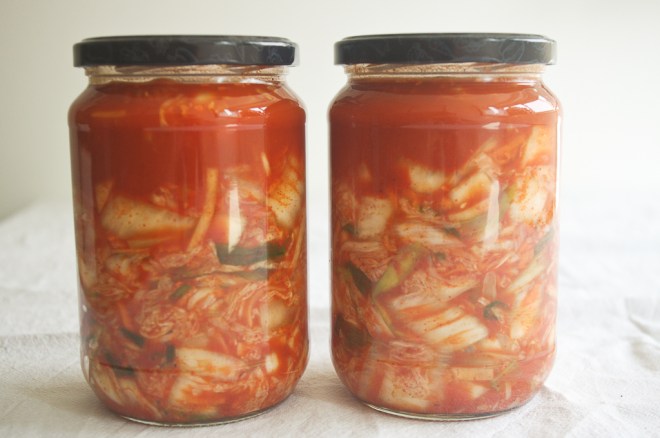
In a bowl, mix together the radish and carrots. Transfer into a clean glass jar. Dissolve salt in water then pour over the veggies. Use a weight or a simple freezer bag filled with a bit of clean water to keep the veggies submerged. Leave the jar loosely covered to ferment at room temperature for about 7-14 days, out of draft and direct sunlight.

After the first day you’ll notice small bubbles starting to form and that means that the veggies have started to ferment. If you start to notice yeast building up on top, just scoop it up and discard, but don’t worry, the veggies are still going to be good. If, however, you notice mold, I would strongly advise discarding the whole batch and starting over.

After 7 days you can taste the veggies and see if they have fermented to your liking. For more tanginess, leave them out longer. If you are happy with the taste, close the jars tightly and transfer them to your fridge. The fermentation process will still continue in the refrigerator, but at a much slower pace. The refrigerated veggies will not go bad for months and will only develop additional acidity as time goes by.

IMGP8608


Već sam ranije pisala o svojem oduševljenju sa radostima laktofermentacije u ovom postu ovdje, pa ako ste sada zainteresirani za još jedan receptić, nastavite čitati. Pošto je omjer od 2-3% soli u odnosu na ostale sastojke ključan za uspješno kiseljenje, moja vam je preporuka da u svim projektima ove vrste uvijek koristite kuhinjsku vagu.

SASTOJCI:

(6,05 kn)

200 g tanko narezane crne rotkve (3,00 kn)

200 g sitno ribane mrkve (3,00 kn)

200 g vode (–)

15,00 g soli (0,05 kn)

PRIPREMA:

U zdjeli pomiješajte rotkvu i mrkve, te ih preselite u čistu staklenku. Rastopite sol u vodi, pa prelijte preko povrća. Sa utegom za kiseljenje ili običnom vrećicom koju ste napunili čistom vodom poklopite povrće kako bi ono ostalo potopljeno. Teglicu labavo poklopite i pustite da sve fermentira na sobnoj temperaturi dalje od propuha i sunčevog svjetla 7-14 dana.

Već nakon prvog dana primijetiti ćete kako se u staklenci formiraju sitni mjehurići, a to je znak da je fermentacija započela. Ako u toku fermentacije primijetite da se na vrhu počinju skupljati kvašćeve gljivice, samo ih odstranite i povrće će i dalje biti skroz ok. S druge strane, ako pak primijetite plijesan, moja vam je preporuka da ipak sve bacite i krenete ispočetka.

Nakon tjedan dana kušajte povrće da vidite da li je zakiseljeno po vašem ukusu. Za više kiseline, ostavite da fermentira još koji dan, no ako ste zadovoljni, čvrsto zatvorite staklenku i preselite u hladnjak. Fermentacija će se i dalje nastaviti u hladnjaku, ali će biti puno sporija. U hladnjaku vam povrće može trajati mjesecima, a s vremenom će se samo dodatno zakiseliti.

Fermented Black Radish and Carrots (vegan) / Fermentirana crna rotkva i mrkva (vegansko)

Easy Kimchi Recipe (including a vegan option) / Jednostavni recept za Kimchi – korejsko pikantno kiselo zelje (uključujući i vegansku opciju)

Oh hey, here’s another fermentation project for you to try out. My best friend got me a Kimchi ready-to-use spice mix and since making the first batch, I got hooked and realized that I could replicate this very easily. The following recipe probably isn’t authentic and I hope that no Koreans out there get offended. But most of the ingredients are really easy to get a hold of, so I think it’s worthwhile to share the recipe, since Kimchi is freaking awesome.

If you want to veganize this recipe, do use either kelp powder or vegan Worcestershire sauce instead of its fishy counterparts. As a substitute for Gochugaru, you can use any other dried chili flakes or hot paprika. However, be sure to adjust the amount to your own spicy food preferences.

IMGP8602

IMGP8593

INGREDIENTS:

(2.77 EUR)

1 kilo of Napa cabbage (1.33 EUR)

100 grams of shredded daikon or black radish (0.20 EUR)

50 grams of shredded carrots (0.10 EUR)

3 scallions (0.40 EUR)

For the spice mix:

2 tbsp salt (0.01 EUR)

1 tbsp Gochugaru – Korean chili flakes (0.13 EUR)

1 tbsp sweet Hungarian paprika (0.13 EUR)

1 tbsp sugar (0.01 EUR)

1 tbsp garlic powder (0.13 EUR)

1 tbsp onion powder (0.13 EUR)

1 tsp ginger powder (0.07 EUR)

1 tbsp Worcestershire sauce or fish sauce (0.13 EUR)

3 tbsp water (–)

IMGP8594

METHOD:

Prepare the spice mix by whisking together all of the ingredients. Taste and adjust seasoning. Give all the veggies a good wash. Cut the cabbage into bite-sized pieces and the scallion into thin strips. Toss all the veggies together then add the spice mix. Use your hands to rub the spices into the veggies, squishing them as you work. Do this for about 5-10 minutes, until the veggies have wilted down. I highly suggest wearing latex gloves for this, as the chili is gonna burn like hell. Cover the bowl with a plastic wrap and let it sit at room temperature for a few hours.

After a few hours have expired, transfer the veggies to clean glass containers. Pack the veggies tightly into the bottom of the jar and then cover them with any remaining liquid. Leave the jars loosely covered to ferment at room temperature for about 2-3 days, out of draft and direct sunlight.

After you notice small bubbles starting to form, that means that Kimchi is fermenting. Taste the Kimchi after 2-3 days and see if it needs more fermentation time. If it’s sour to your liking, tightly cover the jars and transfer them to your fridge. The fermentation process will still continue in the refrigerator, but at a much slower pace. The refrigerated Kimchi will not go bad for months and will only develop additional acidity as time goes by. However, it will taste the best within the first month.

IMGP8601


Hej-haj, evo vam još jedan projekt fermentacije koji možete isprobati. Najfrendica mi je poklonila već gotovi mix začina za Kimchi, a nakon što sam napravila prvu turu navukla sam se i zaključila da to mogu i sama lako izreplicirati. Recept u nastavku vjerojatno baš nije nešto previše autentičan i nadam se da se nitko od Korejanaca neće uvrijediti. Ali pošto većinu sastojaka nije teško nabaviti, mislim da ima smisla podijeliti ovo sa svima jer je Kimchi super.

Ako želite ovaj recept veganizirati, umjesto životinjskih komponenti upotrijebite prah od algi (kelp powder) ili veganski Worcestershire umak. Također, umjesto Gochugarua možete uzeti i neku drugu vrstu čili praha ili čak ljutu papriku, ali količine definitivno prilagodite vlastitim preferencijama kada je u pitanju ljutoća.

SASTOJCI:

(20,90 kn)

1 kg kineskog kupusa (10,00 kn)

100 g ribanog daikona ili crne rotkve (1,50 kn)

50 g ribane mrkve (0,75 kn)

3 mlada luka (3,00 kn)

Za mješavinu začina:

2 žlice soli (0,10 kn)

1 žlica Gochugaru – korejskih čili pahuljica (1,00 kn)

1 žlica slatke paprike (1,00 kn)

1 žlica šećera (0,05 kn)

1 žlica češnjaka u prahu (1,00 kn)

1 žlica luka u prahu (1,00 kn)

1 žličica đumbira u prahu (0,50 kn)

1 žlica Worcestershire umaka ili ribljeg umaka (1,00 kn)

3 žlice vode (–)

PRIPREMA:

Pomiješajte sve sastojke za mix začina, pa kušajte i prilagodite okus. Svo povrće dobro operite. Kupus narežite na komade veličine zalogaja, a mladi luk na tanke trakice. Povrće dobro pomiješajte sa začinima i još ih rukama dobro utrljajte, a samo povrće još onda gnječite jedno 5-10 minuta da malo povene. Definitivno vam preporučam da ruke zaštitite latex rukavicama jer će čili peći kao sam vrag. Kada ste povrće dobro nagnječili, pokrijte zdjelu prijanjajućom folijom pa ostavite sve da par sati miruje na sobnoj temperaturi.

Nakon par sati povrće preselite u čiste staklene posude. Povrće dobro nagurajte na dno posude, pa onda zalijte preostalim sokovima koji su se nakupili u zdjeli. Labavo pokrijte posude i ostavite sve da fermentira na sobnoj temperaturi 2-3 dana, dalje od propuha i sunčevog svjetla.

Nakon dva-tri dana ćete primijetiti da se formiraju mjehurići i to znači da Kimchi fermentira. Probajte Kimchi da vidite da li je dovoljno kiseo, pa ako ste zadovoljni čvrsto zatvorite posude i preselite ih u hladnjak. Fermentacija će se nastaviti dalje i u hladnjaku, ali će biti usporena. Kimchi u hladnjaku može držati mjesecima i s vremenom će se samo još više zakiseliti, međutim, okus će mu biti najbolji unutar prvih mjesec dana.

Easy Kimchi Recipe (including a vegan option) / Jednostavni recept za Kimchi – korejsko pikantno kiselo zelje (uključujući i vegansku opciju)

Easy Homemade Yogurt (No Gadgets Needed!) / Jednostavni domaći jogurt (bez ikakvih gedžeta!)

I’ve been on a vacation for the past two weeks and it’s been glorious. I’ve been experimenting in the kitchen and what recently piqued my interest are various homemade fermented foods, so expect a few more posts about such ventures. The first installment is a homemade yogurt which only requires two ingredients and no additional fancy gadgets. You will, however, need to get a hold of unpasteurized full fat milk, as the regular store-bought pasteurized milks will only go bad and won’t ferment into a yogurt.

IMGP8588

INGREDIENTS:

(1.00 EUR)

4 cups full fat unpasteurized milk (0.80 EUR)

½ cup store-bought yogurt of choice, at room temperature (0.20 EUR)

IMGP8586

METHOD:

Add the milk to a pot and warm it up to a point right before it starts boiling. Take the milk off heat and allow it to cool down. Once you can hold your finger in the milk for a few seconds without burning yourself, the milk is ready and you can stir in the yogurt. If the milk is too hot, you’ll kill the good bacteria. Divide the mixture between clean glass containers.

In the meantime, preheat the oven to 75°C. Turn the oven off then place the loosely covered containers with milk mix in the warm oven to ferment for 18-24 hours. Do not turn the oven on during the fermentation process and don’t open the oven door, as you want the environment to remain slightly warm. The longer you let the yogurt ferment, the tangier it’s going to taste, so adjust fermentation time to your own preferences. Once the fermentation is done, seal the containers and store in fridge for up to a week. If you want denser and creamier yogurt texture, like Greek yogurt, you can place the fermented yogurt in a fine mesh colander lined with cheesecloth to drain the extra liquid. Should you decide to make yogurt again, you can use your homemade stuff as a starter culture.

IMGP8590


Zadnja dva tjedna sam na godišnjem i život je divan. Malo više eksperimentiram u kuhinji, a ono što me u zadnje vrijeme posebno zaintrigiralo je razna fermentirana hrana iz kućne radinosti. Stoga očekujte još postova koji se bave tim stvarima. Kao prvu postaju donosim vam super lagani recept za domaći jogurt za koji vam trebaju samo dva sastojka i ne morate imati nikakve specijalne fensi naprave. Doduše, trebati ćete nabaviti punomasno nepasterizirano mlijeko, s obzirom kako će se dućanska pasterizirana mlijeka samo pokvariti bez da fermentiraju u jogurt. Mlijeko sa mlijekomata će u tu svrhu biti idealna opcija.

SASTOJCI:

(7,50 kn)

4 šalice punomasnog nepasteriziranog mlijeka (6,00 kn)

½ šalice kupovnog jogurta po želji, sobne temperature (1,50 kn)

PRIPREMA:

Mlijeko stavite u lonac i zagrijavajte ga do točke netom prije nego zavrije. Maknite s vatre i pustite da se ohladi toliko da možete u mlijeko umočiti prst i držati par sekundi bez da se opečete, pa onda umiješajte jogurt. Ako vam je mlijeko prevruće, pobiti ćete dobre bakterije i ništa od fermentacije. Raspodijelite miks mlijeka u čiste staklene posude.

U međuvremenu zagrijte pećnicu na 75°C. Ugasite pećnicu, pa u nju stavite labavo poklopljene posude sa mješavinom mlijeka da fermentiraju 18-24 sata. Za cijelo vrijeme fermentacije nemojte ni slučajno paliti pećnicu, niti otvarati vrata, jer želite da unutra i dalje budu postojani uvjeti i relativno toplo. Što dulje jogurt bude fermentirao, to će biti kiselkastiji, pa vrijeme prilagodite vlastitim preferencijama. Kada je fermentacija gotova, čvrsto zatvorite posude i jogurt preselite u hladnjak gdje će držati do tjedan dana. Ako želite još kremastiji i gušći proizvod, poput recimo grčkog jogurta, možete svoj fermentirani jogurt staviti da se cijedi u finoj cjediljci obloženoj gazom. Ako se ubuduće opet odlučite raditi jogurt, kao starter kulturu tada možete iskoristiti svoj domaći jogurt.

Easy Homemade Yogurt (No Gadgets Needed!) / Jednostavni domaći jogurt (bez ikakvih gedžeta!)