Oh hey, here’s another fermentation project for you to try out. My best friend got me a Kimchi ready-to-use spice mix and since making the first batch, I got hooked and realized that I could replicate this very easily. The following recipe probably isn’t authentic and I hope that no Koreans out there get offended. But most of the ingredients are really easy to get a hold of, so I think it’s worthwhile to share the recipe, since Kimchi is freaking awesome.
If you want to veganize this recipe, do use either kelp powder or vegan Worcestershire sauce instead of its fishy counterparts. As a substitute for Gochugaru, you can use any other dried chili flakes or hot paprika. However, be sure to adjust the amount to your own spicy food preferences.


INGREDIENTS:
(2.77 EUR)
1 kilo of Napa cabbage (1.33 EUR)
100 grams of shredded daikon or black radish (0.20 EUR)
50 grams of shredded carrots (0.10 EUR)
3 scallions (0.40 EUR)
For the spice mix:
2 tbsp salt (0.01 EUR)
1 tbsp Gochugaru – Korean chili flakes (0.13 EUR)
1 tbsp sweet Hungarian paprika (0.13 EUR)
1 tbsp sugar (0.01 EUR)
1 tbsp garlic powder (0.13 EUR)
1 tbsp onion powder (0.13 EUR)
1 tsp ginger powder (0.07 EUR)
1 tbsp Worcestershire sauce or fish sauce (0.13 EUR)
3 tbsp water (–)
METHOD:
Prepare the spice mix by whisking together all of the ingredients. Taste and adjust seasoning. Give all the veggies a good wash. Cut the cabbage into bite-sized pieces and the scallion into thin strips. Toss all the veggies together then add the spice mix. Use your hands to rub the spices into the veggies, squishing them as you work. Do this for about 5-10 minutes, until the veggies have wilted down. I highly suggest wearing latex gloves for this, as the chili is gonna burn like hell. Cover the bowl with a plastic wrap and let it sit at room temperature for a few hours.
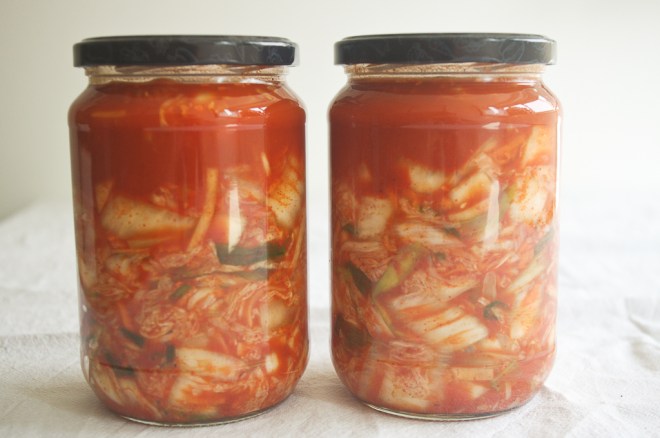
After a few hours have expired, transfer the veggies to clean glass containers. Pack the veggies tightly into the bottom of the jar and then cover them with any remaining liquid. Leave the jars loosely covered to ferment at room temperature for about 2-3 days, out of draft and direct sunlight.
After you notice small bubbles starting to form, that means that Kimchi is fermenting. Taste the Kimchi after 2-3 days and see if it needs more fermentation time. If it’s sour to your liking, tightly cover the jars and transfer them to your fridge. The fermentation process will still continue in the refrigerator, but at a much slower pace. The refrigerated Kimchi will not go bad for months and will only develop additional acidity as time goes by. However, it will taste the best within the first month.

Hej-haj, evo vam još jedan projekt fermentacije koji možete isprobati. Najfrendica mi je poklonila već gotovi mix začina za Kimchi, a nakon što sam napravila prvu turu navukla sam se i zaključila da to mogu i sama lako izreplicirati. Recept u nastavku vjerojatno baš nije nešto previše autentičan i nadam se da se nitko od Korejanaca neće uvrijediti. Ali pošto većinu sastojaka nije teško nabaviti, mislim da ima smisla podijeliti ovo sa svima jer je Kimchi super.
Ako želite ovaj recept veganizirati, umjesto životinjskih komponenti upotrijebite prah od algi (kelp powder) ili veganski Worcestershire umak. Također, umjesto Gochugarua možete uzeti i neku drugu vrstu čili praha ili čak ljutu papriku, ali količine definitivno prilagodite vlastitim preferencijama kada je u pitanju ljutoća.
SASTOJCI:
(20,90 kn)
1 kg kineskog kupusa (10,00 kn)
100 g ribanog daikona ili crne rotkve (1,50 kn)
50 g ribane mrkve (0,75 kn)
3 mlada luka (3,00 kn)
Za mješavinu začina:
2 žlice soli (0,10 kn)
1 žlica Gochugaru – korejskih čili pahuljica (1,00 kn)
1 žlica slatke paprike (1,00 kn)
1 žlica šećera (0,05 kn)
1 žlica češnjaka u prahu (1,00 kn)
1 žlica luka u prahu (1,00 kn)
1 žličica đumbira u prahu (0,50 kn)
1 žlica Worcestershire umaka ili ribljeg umaka (1,00 kn)
3 žlice vode (–)
PRIPREMA:
Pomiješajte sve sastojke za mix začina, pa kušajte i prilagodite okus. Svo povrće dobro operite. Kupus narežite na komade veličine zalogaja, a mladi luk na tanke trakice. Povrće dobro pomiješajte sa začinima i još ih rukama dobro utrljajte, a samo povrće još onda gnječite jedno 5-10 minuta da malo povene. Definitivno vam preporučam da ruke zaštitite latex rukavicama jer će čili peći kao sam vrag. Kada ste povrće dobro nagnječili, pokrijte zdjelu prijanjajućom folijom pa ostavite sve da par sati miruje na sobnoj temperaturi.
Nakon par sati povrće preselite u čiste staklene posude. Povrće dobro nagurajte na dno posude, pa onda zalijte preostalim sokovima koji su se nakupili u zdjeli. Labavo pokrijte posude i ostavite sve da fermentira na sobnoj temperaturi 2-3 dana, dalje od propuha i sunčevog svjetla.
Nakon dva-tri dana ćete primijetiti da se formiraju mjehurići i to znači da Kimchi fermentira. Probajte Kimchi da vidite da li je dovoljno kiseo, pa ako ste zadovoljni čvrsto zatvorite posude i preselite ih u hladnjak. Fermentacija će se nastaviti dalje i u hladnjaku, ali će biti usporena. Kimchi u hladnjaku može držati mjesecima i s vremenom će se samo još više zakiseliti, međutim, okus će mu biti najbolji unutar prvih mjesec dana.

[…] cups vegan Kimchi (0.93 […]
LikeLike
[…] you already tried making Kimchi at home? If so, then you probably have abundance of it and may be searching for ideas to throw Kimchi into […]
LikeLike